Looking at every pudding (Even the weird ones)

a picture of a type of dutch pudding
© User: Takeaway / Wikimedia Commons / CC-BY-SA-3.0

Pudding is a kind of desert made from sugar, milk, and some kind of thickener. 

There are about a million different ways to make pudding that vary across countries and cultures.  For this post, I’m just going to explain the well-known varieties of Western pudding.  Some of them are pretty wild!

Cornstarch-based pudding

In these kinds of puddings, cornstarch acts as a thickener.  Typically, you mix together milk, sugar, cornstarch, and whatever flavoring you want to start.  You then heat it over a stove until it becomes thick.  It’s one of the most common types out there!

Custard-based pudding

Custard is a kind of sweet milk thickened with eggs.  I would argue that custard is just a specific and finicky type of pudding, rather than its own thing, but apparently this is a controversial take. 

 Custard isn’t really eaten by itself, which is probably because of how rich it is.  Often, it’s used to fill donuts or cakes, such as Boston cream pie.

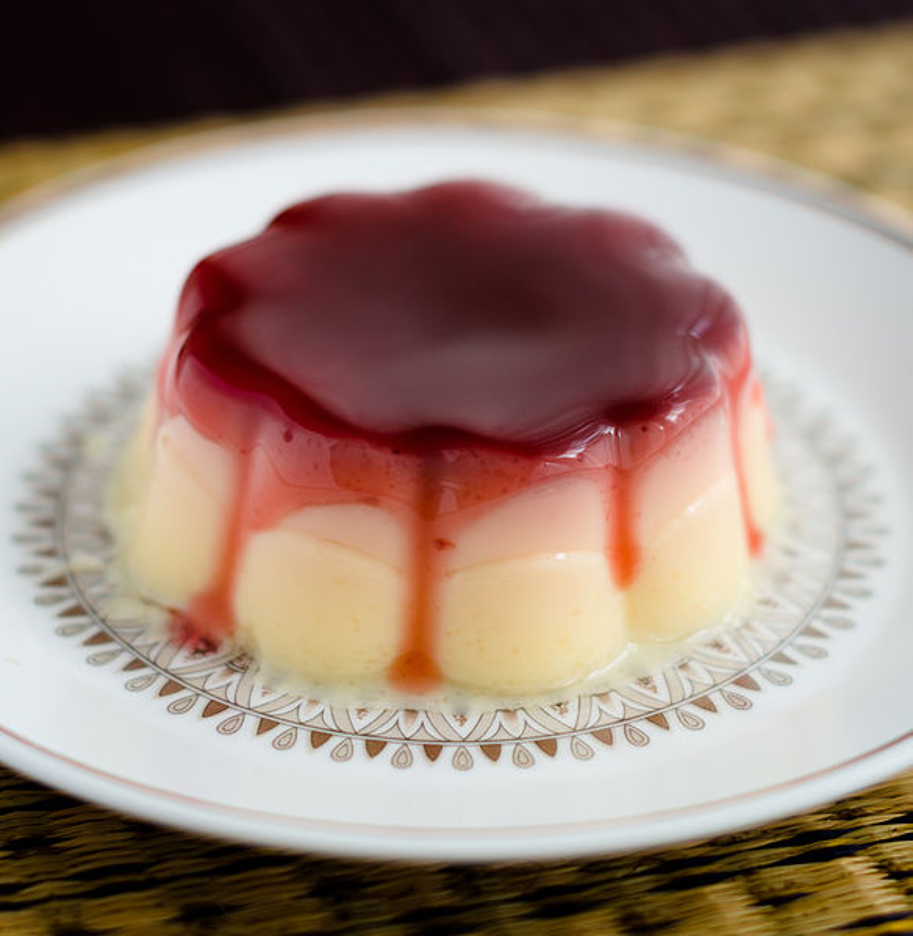
The most well-known custard deserts are flan (crème caramel in some countries) and crème brûlée.  Both of these are custards that are cooked in a water bath and partially steamed. 

Although their custards are the same, the main difference between them is in how they are assembled.  In crème caramel, a cooked sugar syrup is poured into the bottom of the dish before it bakes.  In crème brûlée, sugar is poured on top and torched until a hard shell forms.

Grain-based pudding

This is the kind of pudding you can find variations of just about anywhere in the world.  They’re made from cooking grains in sweet milk until they’ve broken down. Rice pudding falls under this category, as does tapioca pudding. 

Bread pudding

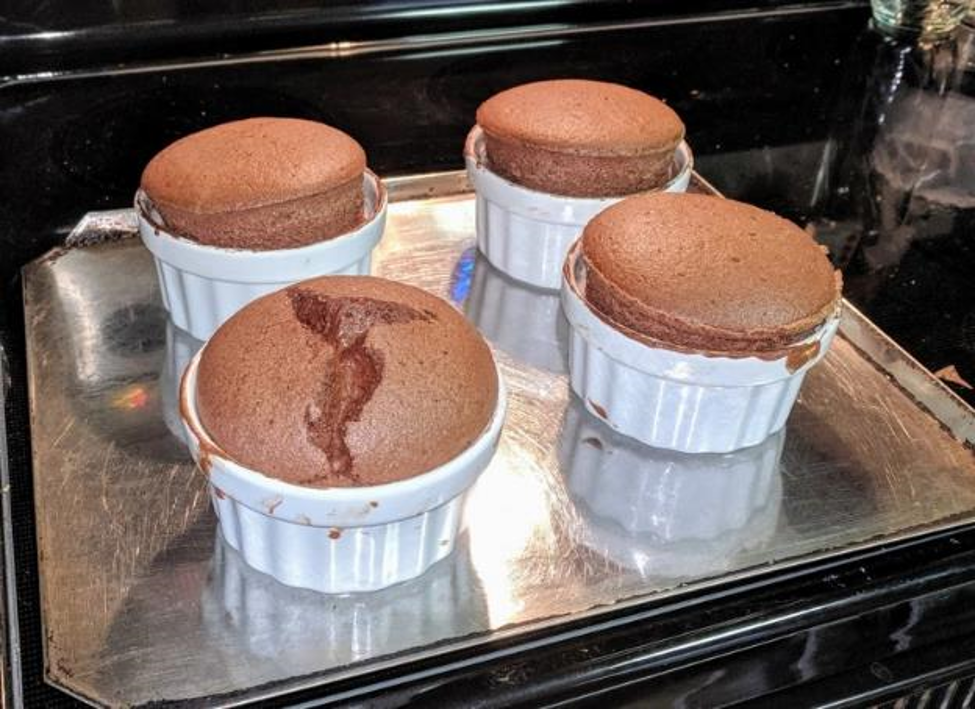
The only time I’ve ever made bread pudding was at college.  My friends and I got together in a crusty dorm kitchen and assembled it from what few ingredients we had on hand.  We stole eggs from an expired carton, bemoaned our lack of vanilla, and cut up bread with a crust so thick that it was chewy when it came out of the oven.

Honestly, though?  Still good.  Bread pudding is an A+ dessert.

The pudding I made is the kind we usually associate with this dish.  You soak bread cubes in uncooked custard and then you bake it for a while.  It’s good, sweet way to use up stale bread.

An English variation of bread pudding is the bread and butter pudding.  It’s basically the same, but instead of cubes, you layer slices of buttered bread.  The custard the bread soaks in also tends to be less sweet. 

There’s also capirotada, a kind of Mexican bread pudding.  Instead of a custard, this pudding is held together with cheese (often cheddar or Monterey jack) and a spiced piloncillo syrup.  It’s also layered with nuts and dried fruit.

Avocado pudding

Avocado puddings are a modern invention.  They’re basically just avocado, sugar, and additional liquid (usually milk or water) whipped up in a blender.  Most avocado puddings have chocolate in them, which is probably because it’s the only flavor that can mask the avocado. 

I’ve had this before, and honestly?  It’s not bad – although, I’ve always liked weird health food.  At least it’s full of healthy fats?

Chia seed pudding

Chia seed puddings are… puddings made of chia seeds.  Yes, those kinds of chia seeds.

This is a kind of pudding you’ll often see on health food blogs.  Chia seeds are full of vitamins and fiber, so it’s natural that healthy eaters would gravitate towards them. 

When chia seeds absorb liquid, they plump up, becoming a tightly packed and gelatinous mixture.  Chia pudding is usually an overnight kind of thing – you throw in all your ingredients, stir them around, and let things thicken on their own.

You can make chia pudding with whole seeds, or you can grind them into a powder first.  I’ve always preferred the first option, since I think it’s more fun to eat something that’s seedy.

Are souffles supposed to fall?: The science behind them

a berry souffle in a mug
© User: jules / Wikimedia Commons / CC-BY-SA-3.0

Just about everyone knows what a souffle is, but I don’t think anyone’s ever seen one in real life.   People think of them as something even master chefs struggle to make.  After all, everyone knows the gag of the chef taking his souffle out of the oven, only for it to deflate as soon as it comes out.  How awful!  The dinner is ruined!  His career is gone!

Honestly, though, the popular idea of souffles is pretty far diverged from how they actually work.  Souffles aren’t that hard to make, and even though they’re French, they really aren’t that fancy.

The basics

Souffles are a type of egg-based dish.  They’re made of whipped egg whites and whatever else you want to fold into it.    They can be savory or sweet.  This is a baking blog, though, so we’re gonna focus on the sweet version.  

The components of a souffle are pretty simple:

  1. Eggs, separated
  2. Flavoring
  3. Roux Base (optional)

You also need a ramekin to make a souffle.  A ramekin is a small, cylindrical dish with a short lip at the top.  They’re measured in terms of ounces.

Okay, so now you know what’s in a souffle.  How do you make it?

Step one: Prepare your base

The base of a souffle can be just about anything.  Cheese.  Potato.  Berries or chocolate.  So long as you can safely fold it into a bunch of whipped egg whites, the sky’s your limit.

Along with adding flavor to your souffle, a base needs to be stable.  It’s providing the structure for your dish, after all! 

In some cases, the ingredients you’re adding are strong enough to make a stable base on their own.  Chocolate souffles, for example, often use melted chocolate, which is already sturdy.

In other cases, you might need to add a roux.  If you didn’t know, then roux is a kind of thickener.  It’s an equal-parts mixture of melted fat and flour that you cook over a stove.  It’s used to thicken sauces or sometimes soups.  

Step two: Whip your egg whites

One you’ve got your souffle base, the next step is to whip your egg whites.  This is the most important part of a souffle, because this is what actually allows them to rise.

When you whip egg whites, the proteins in them break apart and expand, resulting in the formation of lots of air bubbles.  When you fold these airy proteins into the rest of the ingredients, the batter retains the air bubbles. When the souffle is heated, the air within these pockets expands, causing the souffle to rise. 

Step Three: Wait – did you prepare the dish?

After this, you pour your batter into your already-prepared dish!

To prepare a ramekin, you coat it with butter and then sprinkle in something granular.  People often use sugar in sweet recipes and breadcrumbs in savory ones.

This granular aspect of the coating is essential for getting the souffle to rise.  When the air heats up and the batter expands, it needs something to cling to if it wants to travel upwards.  The sugar provides this necessary friction for it to puff up.

It’s like if you’re trying to climb a wall.  It’s much easier to push yourself up if you have a foothold.   

Step Four: The Souffle’s Fall

In popular media, it’s usually a joke if a souffle deflates right out of the oven – but that’s what they’re supposed to do!  When you take a souffle out of the oven, you’re moving it from a hot environment to a cold one.  Once it’s exposed to the cold air, the air inside it contracts, causing the souffle to fall.

Souffles are served right away, before this falling action can begin.  

In my experience…

Having said all that, my own first time making chocolate souffles was a disaster.  

My first mistake was using ramekins of unknown size.  I had gotten them out of a clearance section at an arts and crafts store, and none of them had the ounce measurements on them.  

Did you know that the size of a ramekin doesn’t actually match how much it holds?  And that the amount also varies by company?  I know that now.  I wish I had known it before I spent an hour pouring water into cups and looking up obscure Q&A forums.

Everything was pretty downhill from there.  I waited until the last minute to prepare the ramekins.  I used too many bowls.  When I folded melted chocolate into egg whites, the mixture was so uncooperative I almost threw the bowl into the sink and called it a night.

In the end, though, they still turned out okay!  Despite all my mistakes, all the souffles still rose (and only one of them ended up cracking):

Chocolate souffles on a baking sheet.  One of them is cracked.

But that just means you don’t need to be a great chef to make a souffle.

And, yes – they all still fell.

Macarons aren’t as hard as you think

macarons and flowers laid out next to a small cup of tea
Photo by Brooke Larke on Unsplash

Macarons usually have an air of expense and prestige around them, but once you know how they’re made, they lose a lot of that manufactured fanciness.  They also become pretty easy to make yourself!

A macaron has two parts: the cookie shell, and the filling. 

Basic macaron shells are made up of four ingredients:

  1. Almond flour
  2. Powdered sugar
  3. Egg whites
  4. Granulated sugar

That’s it!  Super simple.­­­­

About the egg whites

Macarons are a meringue-based cookie.  Meringue is a combination of whipped egg whites and sugar. 

All the leavening in these cookies comes from the egg whites.  When they’re whipped, the proteins in eggs expand, resulting in lots of air bubbles being trapped in the meringue.  When hot air expands in these air bubbles, they rise.

When you make macarons, you want to beat the egg whites to very stiff peaks.  One of the classic tests to tell if they’re done is to take the bowl and hold it over your head.  If they stick in the bowl, you’re good!

Getting the right batter consistency

The “tricky” part of making macarons comes when you combine everything together. 

Macarons are made with almond flour, so the purpose of this process is not to form gluten.  Instead, the folding process is meant to beat air out of the batter!

The infamous advice for macaron-makers is that the batter must be a “lava-like consistency” before you make it.  But what even IS lava-like?  This advice is worthless for people who have never made them before. 

The best way to figure out the proper consistency is to watch someone make macarons.  The second-best way is to pull together various descriptions and cry.

Preparing for baking

Once you’ve got the batter and you’ve piped it out, macarons require a few extra steps before they go in the oven.

These steps don’t actually change the flavor, but they are necessary for getting the famous look of the macarons.

First, you need to slam the tray down on a table a few times!  This allows any air bubbles trapped in the batter to rise to the surface.  That way, they won’t rise when baking and ruin the smooth outer shell of the macaron.

Second, you need to let them sit for a while.  Your goal is to dry out the top of the macarons – enough that they don’t stick to your finger when you touch them.  This is necessary for forming the foot of the macaron.

Once the film is set and there’s no air bubbles, you bake them!

Filling the macarons

Now that your macarons have baked cooled, you have to put something between them.  That’s why they’re sandwich cookies, after all.

The fillings of macarons can be just about anything you want them to be, honestly.  The most common ones I’ve seen are buttercream, fruit curds, or some kind of ganache.

Since the cookie part of the macaron is pretty sweet, I’ve always preferred fillings that are bitter or tangy.  You can put in whatever you think best compliments the outer flavor.

Serving your macarons

You should serve your macarons the day after you make them.  This allows the flavors to meld and for the filling to soften the shell, which makes the texture more uniform.  

In conclusion…

Although macarons may look fancy, they really aren’t as out-of-reach as some people may fear.  So long as you know what you’re doing, they should come out okay. 

(This is my go-to recipe for chocolate macarons, by the way.)

Making macarons really shouldn’t be a stressful process.  If you want to strive for those picturesque macarons, then go ahead!  But if you’re making them for yourself or for some friends, then it doesn’t matter if they didn’t come out how you wanted them to.  

If you give your friend a macaron, then they aren’t going to complain about how it looks.  They’re going to say, “Oh my god, is this a macaron?!”  And then they’ll eat it and think you’re some kind of baking genius.  

It happens every time.